Q&A on Analog Photography
With this new age of digital photography, the common knowledge of the analog process is not so common anymore. New photographers have now started off with cameras built into their phones instead of cheap point-and-shoot film cameras. In this post I'll answer some common questions beginners may have about using a film camera and the analog process.
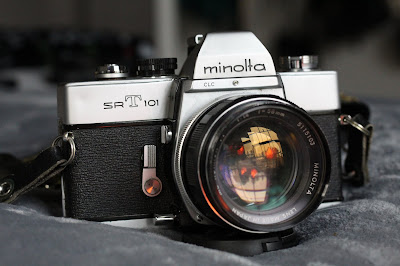
 |
| Film camera selfie |
1. How does a film camera work?
A film camera works in a similar way to how digital cameras work - by recording the lens-focused light that is exposed to a sensor inside of the camera. However, instead of the light information recording into a digital file, the light exposes a strip of material called film. Film strips are typically made of plastic and coated in light-sensitive silver crystals (photographyhistoryfacts.com, 2021). The crystals undergo a chemical change based on how much light is exposed onto the sections of film. In order to view the pictures the film has to be developed in photographic chemicals.
 |
| Example of a point-and-shoot camera |
2. What is the film developing process?
The first step in developing film is to take the film out of the camera. This is where many first time film users might screw up - the film is still light sensitive and needs to be winded back into the canister before being taken out of the camera. Usually point-and-shoot cameras will wind the film for you, but if not the process is as simple and pushing a button and winding a lever. After the film is wound up and taken out, it has to be spun onto a reel that then goes into a light-sealed container. This process has to be done in complete darkness - or else your film will be ruined. Once in the container, the chemical process can start. This isn't a process that is typically done at home, but instead taken to a lab who will develop the film for a fee. Here is what usually happens to develop film:
- Pre-wash the film with water for a bit, then pour it out.
- Measure and add a developer into the tank container. Developer turns the light sensitive silver into a solid coating on the film. The developer also needs to be diluted before poured into the tank. Wait a few minutes, gently shaking the tank occasionally, then dump out.
- Add stop bath into the tank next. The stop bath stops the developer from over working on the film. Again, wait a bit, then pour out.
- Next is the fixer. This chemical allows the film to be exposed to light without ruining it. Fixer should be added and swished around, then poured out.
- The next action is a long rinse of the film to remove any excess chemicals.
- Finally, remove the film from the tank and reel and hang up to dry.
 |
| A color photo negative |
3. What is a negative?
After developing the film you will be left with negatives. A negative is an inverse image of the photograph that was exposed onto the film. In order to view the image "normally," the negative must be scanned and inverted using computer software. The old-school way to invert the negative is to print it in the darkroom. Darkroom printing is essentially the same process as exposing the film with a camera, but instead you are exposing the negative onto a piece of light-sensitive paper, and then developing that paper with similar chemicals. The result will be a corrected image on a sheet of paper, or a "print."
4. How long does it take to get film photos back from a lab?
Depending on the lab's efficiency in developing, and the technology they have on-hand, it can take anywhere from a couple hours to several days. Usually photographic labs will have technology that can develop film in a matter of minutes, but again it depends on the lab. Local pharmacies like CVS or Walgreens can also develop film, but they can only give you digital files or prints, not your original negatives. They usually take more than a week to finish developing.
5. Do I have to take my film to a professional lab or is Walgreens just as good?
Like I mentioned above, some pharmacies have film developing available for about $15 without the negatives. This option is good for someone who just wants the photos, but if you're a more serious film photographer a professional lab is a much better idea for about the same price. They have a higher quality process and will give you negatives along with (sometimes) scans of the photos.
6. How much does it cost?
Usual cost of developing a 24 exposure film roll will be anywhere from $10 to $25. This all depends on if you order prints, scans, or just the negatives. It will typically be cheaper if you just want the negatives.
7. Where should I buy a film camera?
With the recent popularity of film cameras, you can get a brand new point-and-shoot film camera at almost any big box store. Online sites such as eBay are also good if you're looking to spend a small amount on a beginner camera.
8. Why should I use a film camera?
For me, the biggest appeal of film photography is the uncertainty of the results, which then make me focus more on what I decide to capture. With film, you only have so many chances at taking the "perfect" photograph. There is also an intimacy in the process of analog photography that is not quite the same as with digital. If you want to read more about pros and cons of analog and digital, check out my last blog post.
References

Comments
Post a Comment